As I migrated my insfrasture from WSL to VM, this post would no longer be updated. Check newer info in LFS 编译记录 (VirtualBox + Void).
Noted that I now focus on building LFS on VirtualBox instead, so this post may still be more relevant if you plan to build WSL2-Linux-Kernel or LFS within VHDX on WSL.
准备工作
Knowledge Base
软件编译
LFS 相关
- Linux From Scratch Version 12.1
- Linux From Scratch 版本 12.1 - 中文翻译版
- 更新相当及时,由于译者也是 LFS 贡献者,翻译质量也很优秀
只是翻译,文中的 tz、kbd、locales 这些其实可以本地化一下
- 编译 Linux From Scratch 8.4 心得
调试
下载 LFS 和源文件
安装依赖
version-check.sh 见 Chapter 2.2. Host System Requirements
排错
# tar(child): xz: Cannot exec: No such file or directory
# https://superuser.com/questions/801159/cannot-decompress-tar-xz-file-getting-xz-cannot-exec-no-such-file-or-direct
sudo apt install xz-utils

# /bin/sh -> /bin/dash
# ERROR: /bin/sh does not point to bash
# https://askubuntu.com/questions/328364/bin-sh-is-a-symbolic-link-that-doesnt-point-to-bin-bash
sudo dpkg-reconfigure dash
sudo dpkg-reconfigure bash
依赖汇总
sudo apt install bison gawk gcc g++ m4 make patch nnn tar tmux vim xz-utils zstd texinfo python3-dev python3 python3-pip
分区
- root partition: 10G 起步,20G 够用,30G 很奢侈
- swap: SSD 不需要,next
由于是在 WSL2 环境下尝试 LFS,不知道怎么搞分区,先在 Windows 磁盘管理里建了个容量上限 15G,动态分配的 VHDX,然后在 WSL 里用 GParted 创建文件系统。
后面的事实证明这个大小定得很精准,GParted 初始化前大小约 60M,到 #留念 部分磁盘扩展到了 11G,绰绰有余。
- Adding Another Disk to WSL2
- Mount a Linux disk in WSL 2 (Windows 11 Build 22000+)
Windows
# Get the disk number (in this case, 1)
$ Write-Output "\\.\PhysicalDrive$((Mount-VHD -Path '.\lfs-rootfs.vhdx' -PassThru | Get-Disk).Number)"
\\.\PhysicalDrive1
# Mount the raw device (so we can partition it in WSL)
$ sudo wsl --mount \\.\PhysicalDrive1 --bare
The operation completed successfully.
WSL
# Install GParted
sudo apt install -y gparted
# Root privileges are required for running gparted
sudo gparted
# check the mounted device name
sudo fdisk -l
- Open
GParted -> Devicestab, and we’ll see there is a 15GiB device named/dev/sde. - Delete any partition or free space, create only one
ext4partition. - Click finish and wait for the completion.
- Now type the following command to and if there is a partition, we’re done:
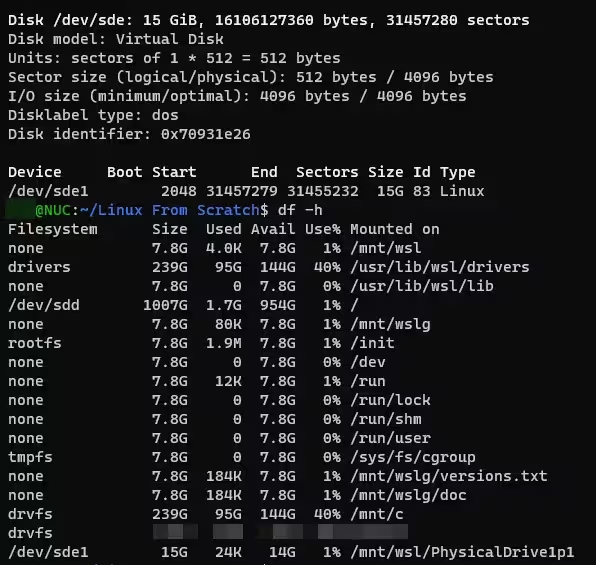
$ sudo fdisk -l
Device     Start      End  Sectors Size Type
/dev/sde1   2048 31455231 31453184  15G Linux filesystem
- Unmount the VHDX in Windows & mount the first partition to WSL:
# No need to add `--bare` param now that the disk is formatted
$ wsl --unmount \\.\PhysicalDrive1
The operation completed successfully.
# Now mount a specific partition to WSL
# Write-Output "\\.\PhysicalDrive$((Mount-VHD -Path '.\lfs-rootfs.vhdx' -PassThru | Get-Disk).Number)"
$ sudo wsl --mount \\.\PhysicalDrive1 --partition 1 --type ext4
The disk was successfully mounted as '/mnt/wsl/PhysicalDrive1p1'.
Note: The location will be different if you have modified the automount.root setting in /etc/wsl.conf.
To unmount and detach the disk, run 'wsl.exe --unmount \\.\PhysicalDrive1'.
- The partition now is available in WSL:
$ df -h
/dev/sde1        15G   24K   14G   1% /mnt/wsl/PhysicalDrive1p1
后面发现挂载的 但其实后面都是 root 用户操作,也没普通用户什么事……/mnt/wsl/PhysicalDrive1p1 没有读写权限,但是另一个 WSL 访问确实完全正常的……参考 File Permissions for WSL 在 Windows 下把 VHDX 的所有权移交给了用户,并且给了当前用户 Full Control 的权限,在 WSL 下 sudo chown -R -v xxx /mnt/wsl/PhysicalDrive1p1,似乎是修好了。
设置 $LFS,在普通用户和 root 的 .bashrc 里都加上 export LFS=/mnt/wsl/PhysicalDrive1p1 (注意和教程里的 /mnt/lfs 区分),并且确保全程都在用 bash。顺带一提,如果不想要 GParted 残留记得卸载。
准备构建
直接解压下载好的软件包,同时查看 security advisories ,以确认是否需要升级。也可以到 patches database 下载需要的 patch(3.3. Needed Patches)。
# Run as ROOT
mkdir -v $LFS/sources
# Make this directory writable and sticky
chmod -v a+wt $LFS/sources

sha1sum -c SHA1SUMS
tar xvf lfs-packages-12.1.tar
rm lfs-packages-12.1.tar

cd 12.1
md5sum -c md5sums
接着按照指南走,标注一下我用的用户名和密码:
root: root
lfs: lfs
为 lfs 用户创建 .bashrc 时需要注意修改 $LFS。
cat > ~/.bashrc << "EOF"
set +h
umask 022
LFS=/mnt/wsl/PhysicalDrive1p1
LC_ALL=POSIX
LFS_TGT=$(uname -m)-lfs-linux-gnu
PATH=/usr/bin
if [ ! -L /bin ]; then PATH=/bin:$PATH; fi
PATH=$LFS/tools/bin:$PATH
CONFIG_SITE=$LFS/usr/share/config.site
export LFS LC_ALL LFS_TGT PATH CONFIG_SITE
EOF
Export 编译 flag 有个问题:这 4 核 8 线程我也不知道该用 4 还是 8,就小点好了。
直接 -j8 即可。
export MAKEFLAGS='-j8'
Test suite 的问题见 Part II. 4.6. About the Test Suites 里提供的两个链接:
构建 Toolchain 和 Chroot 环境
只介绍第一步 binutils 的编译过程:
# Make sure $LFS is set one more time
echo $LFS

# Extract tarball
cd $LFS/sources
tar xf binutils-2.42.tar.xz
cd binutils-2.42

# The Binutils documentation recommends building Binutils in a dedicated build directory
mkdir -v build
cd build

# Configure
../configure --prefix=$LFS/tools \
             --with-sysroot=$LFS \
             --target=$LFS_TGT   \
             --disable-nls       \
             --enable-gprofng=no \
             --disable-werror    \
             --enable-default-hash-style=gnu

# Build & log time
time {
make && make install;
}

# Clean up
cd $LFS/sources
rm -rf binutils-2.42
编译用时 13s,为估计后面编译时间的基准,即 SBU。
real    0m13.323s
user    0m32.800s
sys     0m3.798s
5.3. GCC-13.2.0 - Pass 1 这里有点坑,手册写的这些命令,都是要在 $LFS/sources/gcc-13.2.0 目录下执行的:
tar -xf ../mpfr-4.2.1.tar.xz
mv -v mpfr-4.2.1 mpfr
tar -xf ../gmp-6.3.0.tar.xz
mv -v gmp-6.3.0 gmp
tar -xf ../mpc-1.3.1.tar.gz
mv -v mpc-1.3.1 mpc
目前耗时最久的还是两次 gcc, 6.18. GCC-13.2.0 - Pass 2 耗时:
$ time { make; }
real    9m54.144s
user    31m44.675s
sys     1m29.656s
进入 Chroot

此时 $LFS 的目录结构
只需注意以 root(而不是 lfs)运行命令即可。
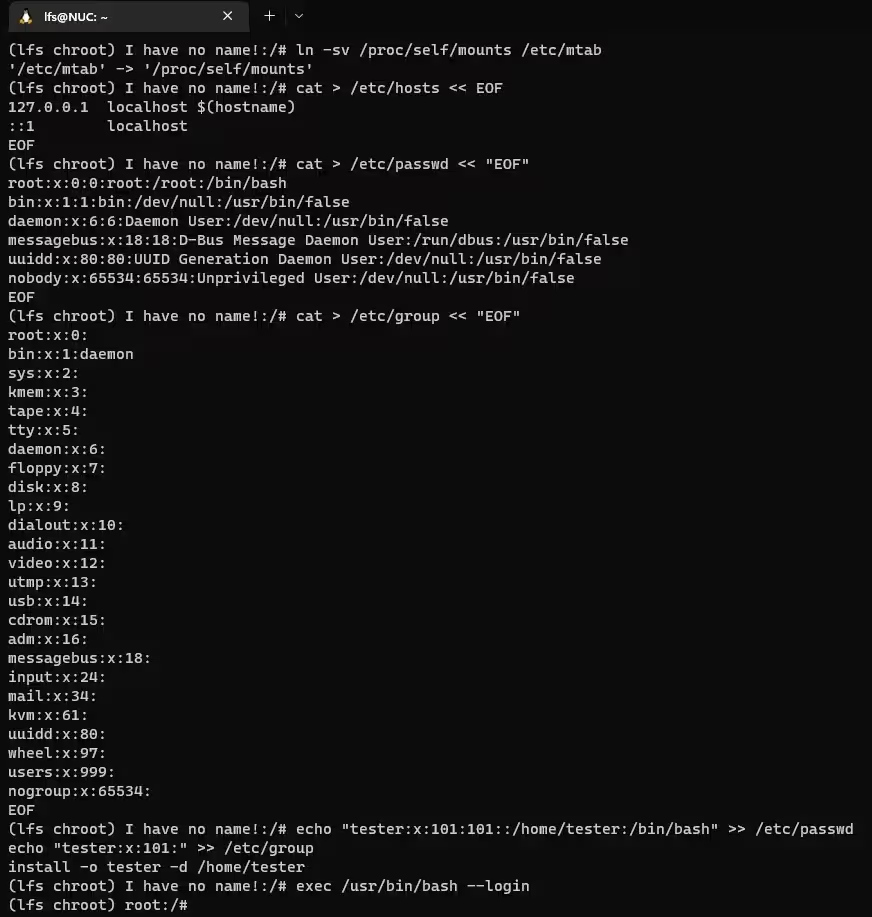
I have no name!
看 7.4. Entering the Chroot Environment 还学到了,如果 /etc/passwd 不存在,Bash 会显示 I have no name! ,而且从下面两行命令看和 SuperUser 的回答 看,超管账户只需要满足 uid=0 即可,不一定非要是字面上的 root。
$ (lfs chroot) I have no name!:/# whoami
whoami: cannot find name for user ID 0: No such file or directory
$ (lfs chroot) I have no name!:/# id
uid=0 gid=0 groups=0
参考前文进行编译,或许可以运行一下 test suite?Anyway,反正我没遇到什么问题。
备份
完成之后来到 7.13. Cleaning up and Saving the Temporary System,这里先退出 chroot 环境做一下备份,避免出错了得全部重头再来。
手册里提到备份是压缩的,所以要挺久的,确实是等了得有 20 分钟。 注意完成之后要重新加载 virtual kernel file system 并进入 chroot 环境。
# Chroot
exit
# WSL, run as ROOT
mountpoint -q $LFS/dev/shm && umount $LFS/dev/shm
umount $LFS/dev/pts
umount $LFS/{sys,proc,run,dev}
# Make sure $LFS is set for root
echo $LFS
# Backup
cd $LFS
tar -cJpf '/mnt/c/WSL/lfs-temp-tools-12.1.tar.xz' .
如果觉得太慢,其实可以用支持多核多线程的 pigz 替代 gzip,实测压缩时间减少到原来的 1/4,安装参考 #自定义软件,因为我在 #BLFS 阶段才用上,不确定需要安装哪些依赖,反正 zlib 是肯定要的。
# 备份 LFS
tar cf - . | pigz > /mnt/c/WSL/lfs-12.1-rootfs.tar.gz

# 粗略的 benchmark
$ tar cf - Sarasa-1.0.8 | pigz > sarasa-1.0.8.tar.gz
第一次 12s,第二次 8s
$ tar czf sarasa-1.0.8.tar.gz Sarasa-1.0.8
40s
后文 #留念 阶段也可以使用这个来加速: 我会说我导出 4 小时才发现不对劲吗= =
$ tar -cJpf 'sarasa-1.0.8.tar.xz' Sarasa-1.0.8
56s
$ tar cf - Sarasa-1.0.8 | pigz -p 4 > sarasa-1.0.8.tar.xz
12s
$ tar cf - Sarasa-1.0.8 | zstd -T4 > sarasa-1.0.8.tar.zst
7s
还原
希望用不上吧……
一定要以 root 身份运行,并且确保 $LFS 环境变量已经正确设置,不然 WSL 就🈚️了。
cd $LFS
rm -rf ./*
tar -xpf $HOME/lfs-temp-tools-11.2.tar.xz
构建 LFS 系统
注意 chroot 里没有设置 MAKEFLAGS,参考 4.5. About SBUs 和 7.4. Entering the Chroot Environment 的内容,在 chroot 里输入下面的命令可以设置:
declare -x MAKEFLAGS='-j5'
注意事项
在 8.5. Glibc-2.39 需要注意,不要安装全部 locales,不过其实手册里的 minimum set of locales necessary for the optimal coverage of tests 已经 cover 了我的常用 locales:
# This is BAD (time-consuming)
# make localedata/install-locales

# This is good
# Required by test suite
localedef -i POSIX -f UTF-8 C.UTF-8 2> /dev/null || true
localedef -i ja_JP -f SHIFT_JIS ja_JP.SJIS 2> /dev/null || true
# Additonal locale
localedef -i en_US -f UTF-8 en_US.UTF-8 2> /dev/null || true
localedef -i zh_CN -f UTF-8 zh_CN.UTF-8 2> /dev/null || true
localedef -i zh_CN -f GB18030 zh_CN.GB18030
localedef -i zh_HK -f BIG5-HKSCS zh_HK.BIG5-HKSCS
localedef -i zh_TW -f UTF-8 zh_TW.UTF-8
8.5.2.2. Adding time zone data 里直接输入:
ln -sfv /usr/share/zoneinfo/Asia/Shanghai /etc/localtime
8.20. GMP-6.3.0 需要注意,GMP 会根据编译 CPU 进行高度优化,在其他 CPU 的环境下运行很可能会出错,届时在编译加入 --host=none-linux-gnu 重新编译。
8.50. Libffi-3.4.4 同理,需要把 --with-gcc-arch=native 改成 --with-gcc-arch=x86-64 或 GCC Manual 中合适的选项。
8.24. Acl-2.32 的 test suite 需要 Coreutils 支持,不过那个在 8.57. Coreutils-9.4…… PS: 经过 gcc 的地狱 test,真的做到 8.57. 的时候已经没有心情做 Acl 的测试了╮(╯_╰)╭
在编译 LFS 的 8.27. Shadow-4.14.5 前可以先编译 BLFS 里的 CrackLib-2.9.11 ,然后在编译前运行 sed -i 's:DICTPATH.*:DICTPATH\t/lib/cracklib/pw_dict:' etc/login.defs。然而安装 CrackLib 的时候提示 bash: autoreconf: command not found,看来顺序没弄好,又得在安装完整个 LFS 系统后再回头安装 CrackLib,然后重新编译 Shadow……
8.62. Groff-1.23.0 中注意修改 PAGE :
PAGE=A4 ./configure --prefix=/usr
跳过了 8.63. GRUB-2.12 的安装
多核测试
有些运行 test suite 时可以选择多核处理:
- 8.36. Libtool-2.4.7
- 8.45. Autoconf-2.72
TESTSUITEFLAGS=-j4 make check
GCC Make Check
在 8.26. GCC-12.2.0 中,gcc 的 make test 很耗时,但可以多核(~~这也能多核?~~这不多核可就真要了老 PC 的命,一轮测试跑一天不是梦)运行:
# Test the results as a non-privileged user, but do not stop at errors
chown -Rv tester .
# Use 4 cores
su tester -c "PATH=$PATH make -j4 -k check"
好家伙,这玩意儿是真的耗时,官方的两个 log 都跑了一个多甚至两个小时……我也跑了快俩小时……
和手册里估计的一样,只有 4 个可以忽略的 PR100400 相关 FAIL。
附个完整报告:
                === g++ tests ===

Running target unix
XPASS: c-c++-common/goacc/kernels-decompose-pr100400-1-2.c  -std=c++98 (internal compiler error)
FAIL: c-c++-common/goacc/kernels-decompose-pr100400-1-2.c  -std=c++98 (test for excess errors)
XPASS: c-c++-common/goacc/kernels-decompose-pr100400-1-2.c  -std=c++14 (internal compiler error)
FAIL: c-c++-common/goacc/kernels-decompose-pr100400-1-2.c  -std=c++14 (test for excess errors)
XPASS: c-c++-common/goacc/kernels-decompose-pr100400-1-2.c  -std=c++17 (internal compiler error)
FAIL: c-c++-common/goacc/kernels-decompose-pr100400-1-2.c  -std=c++17 (test for excess errors)
XPASS: c-c++-common/goacc/kernels-decompose-pr100400-1-2.c  -std=c++20 (internal compiler error)
FAIL: c-c++-common/goacc/kernels-decompose-pr100400-1-2.c  -std=c++20 (test for excess errors)

                === g++ Summary ===

# of expected passes            229940
# of unexpected failures        4
# of unexpected successes       4
# of expected failures          2069
# of unsupported tests          9913
/sources/gcc-12.2.0/build/gcc/xg++  version 12.2.0 (GCC)

                === gcc tests ===

Running target unix

                === gcc Summary ===

# of expected passes            176414
# of expected failures          1382
# of unsupported tests          2367
/sources/gcc-12.2.0/build/gcc/xgcc  version 12.2.0 (GCC)

                === libatomic tests ===

Running target unix

                === libatomic Summary ===

# of expected passes            54
                === libgomp tests ===

Running target unix

                === libgomp Summary ===

# of expected passes            4879
# of expected failures          32
# of unsupported tests          323
                === libitm tests ===

Running target unix

                === libitm Summary ===

# of expected passes            44
# of expected failures          3
# of unsupported tests          1
                === libstdc++ tests ===

Running target unix

                === libstdc++ Summary ===

# of expected passes            15249
# of expected failures          95
# of unsupported tests          374

Compiler version: 12.2.0 (GCC)
Platform: x86_64-pc-linux-gnu
configure flags: --prefix=/usr LD=ld --enable-languages=c,c++ --disable-multilib --disable-bootstrap --with-system-zlib
新知识
shasum是 Perl 脚本 (8.41.2. Contents of Perl),但是sha1sum,sha224sum,sha256sum,sha384sum,sha512sum这些都在 Coreutils 的内容 (8.54.2. Contents of Coreutils)ninja和meson都是 Python 写的 (8.52. Ninja-1.11.0 & 8.53. Meson-0.63.1)- Coreutils 中有个命令
[,位于/usr/bin/[, 效果等同于test - vim 还有其他语言的拼写检查,可以在 spell 下载(8.69.2. Configuring Vim)
配置系统
历经千辛万苦(主要是 gcc make test 地狱),终于来到了 Chapter 9. System Configuration。
9.5.1. Creating Network Interface Configuration Files,准备用作 WSL rootfs 的话需要注释掉 IP 等设置:
# /etc/sysconfig/ifconfig.eth0
ONBOOT=yes
IFACE=eth0
SERVICE=ipv4-static
# IP=192.168.1.2
# GATEWAY=192.168.1.1
# PREFIX=24
# BROADCAST=192.168.1.255
9.5.2. Creating the /etc/resolv.conf File,WSL 会自动生成 /etc/resolv.conf,所以跳过,9.5.3-4 同理。
9.6.4. Configuring the System Clock,运行下面的命令,确定硬件时间是 UTC,所以~~需要把手册里的 UTC=1 改成 UTC=0~~保持命令不变 :
# Check hardware lock setting
hwclock --localtime --show

cat > /etc/sysconfig/clock << "EOF"
# Begin /etc/sysconfig/clock

UTC=1

# Set this to any options you might need to give to hwclock,
# such as machine hardware clock type for Alphas.
CLOCKPARAMS=

# End /etc/sysconfig/clock
EOF
9.6.5. Configuring the Linux Console 自行了解,没有配置文件则 console bootscript 不会做任何操作,而且 Linux console(注意这玩意儿不是通常理解的 terminal)其实并不实现 CJK 字符的完全显示,所以留空即可。
9.6.8. The rc.site File 可以取消默认设置中 distro 和 colored prefix 的相关注释。
9.7. Configuring the System Locale
cat > /etc/profile << "EOF"
# Begin /etc/profile

for i in $(locale); do
  unset ${i%=*}
done

if [[ "$TERM" = linux ]]; then
  export LANG=C.UTF-8
else
  export LANG=en_US.utf8
fi

# End /etc/profile
EOF
设置启动项
制作分区表
10.2. Creating the /etc/fstab File
cat > /etc/fstab << "EOF"
# Begin /etc/fstab

# file system  mount-point    type     options             dump  fsck
#                                                                order

/dev/sdc       /              ext4     defaults            1     1
# no swap for  SSD
/dev/<yyy>     swap           swap     pri=1               0     0
proc           /proc          proc     nosuid,noexec,nodev 0     0
sysfs          /sys           sysfs    nosuid,noexec,nodev 0     0
devpts         /dev/pts       devpts   gid=5,mode=620      0     0
tmpfs          /run           tmpfs    defaults            0     0
devtmpfs       /dev           devtmpfs mode=0755,nosuid    0     0
tmpfs          /dev/shm       tmpfs    nosuid,nodev        0     0
cgroup2        /sys/fs/cgroup cgroup2  nosuid,noexec,nodev 0     0

# End /etc/fstab
EOF
注意根据 df -h 输出修改 /dev/sdc,MS-DOS / Windows 格式的硬盘就先不加载了,如果用作 WSL rootfs 不需要手写分区表,WSL 会自动生成。
编译 Linux 内核
10.3. Linux-6.7.4 开始编译 Linux 内核,注意这需要 0.6-20.4 SBU(通常是 1.4 SBU)的时间并预计占用 1.8-10.6 GB(通常是 2 GB)的硬盘空间。
因为我隔了一天才继续这一步,编译前务必进入 chroot 环境,并确保 $LFS 和 MAKEFLAG 环境变量设置正确。
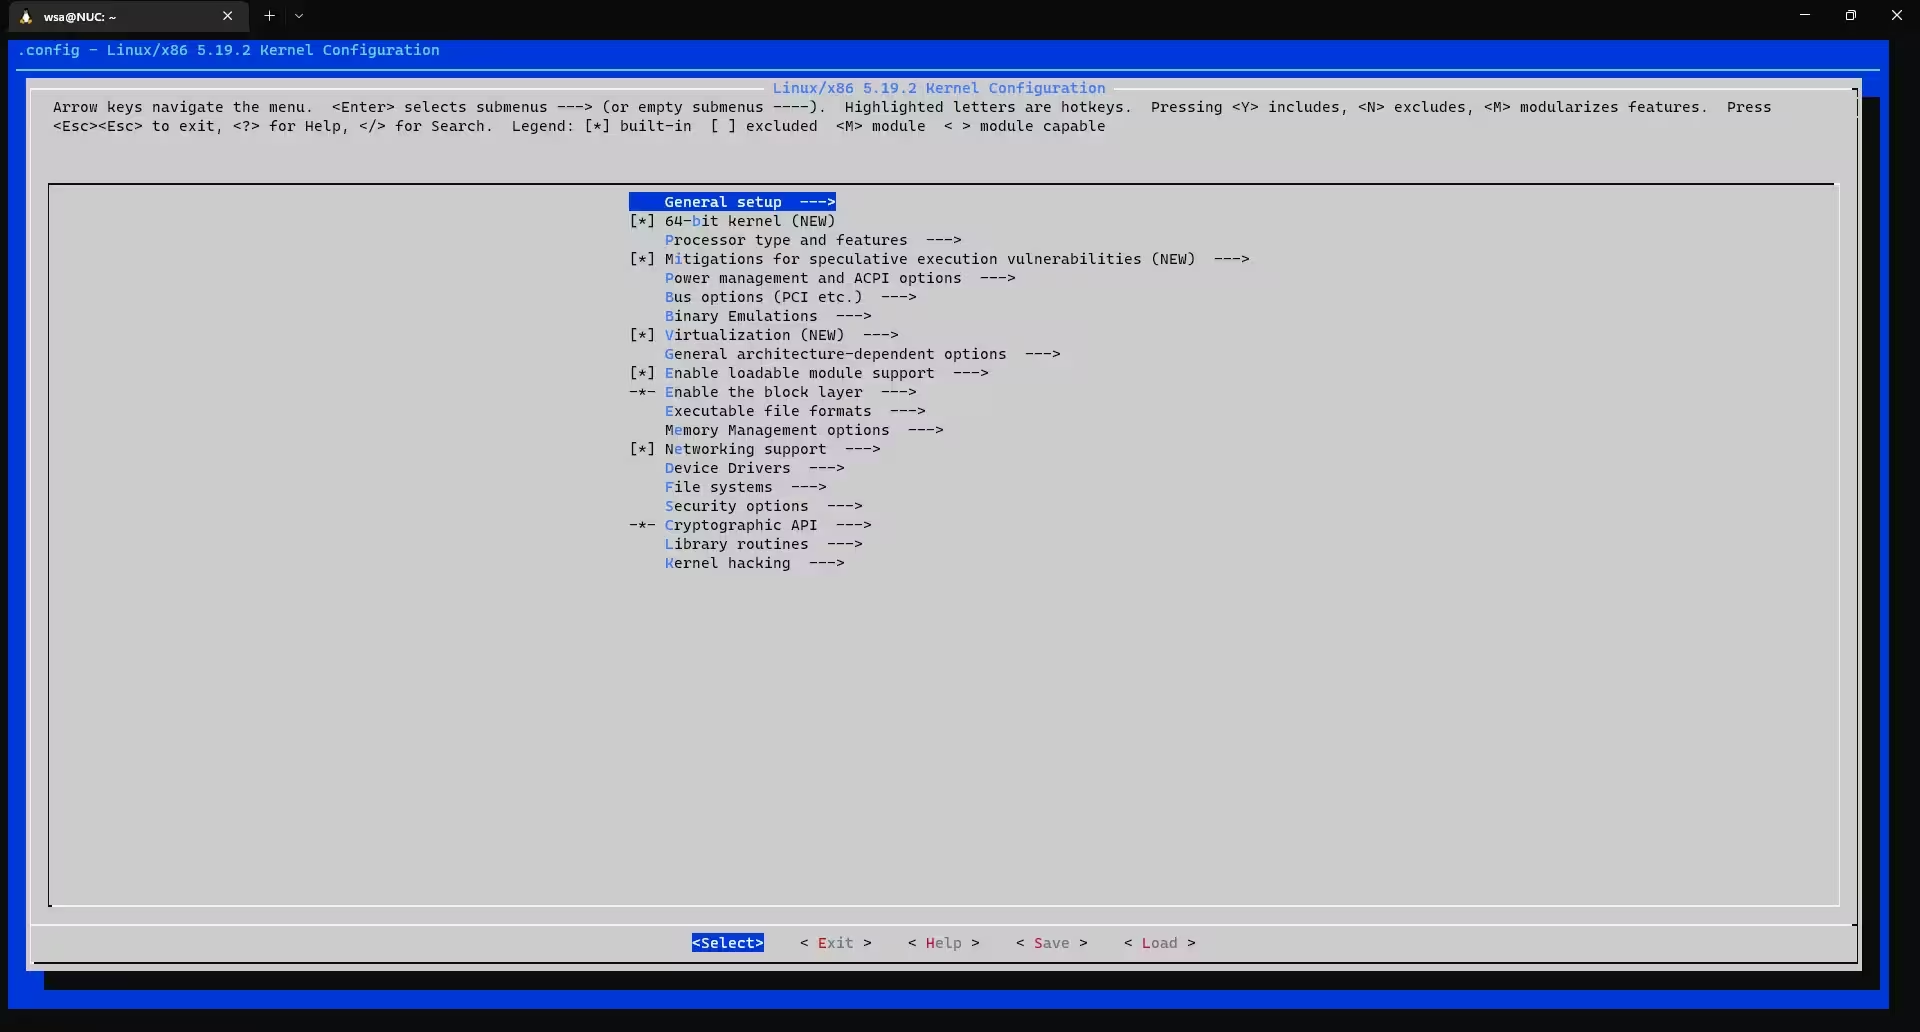
make config 没怎么看懂,就按照手册和默认来了,注意 [*] 和 <M> 是不一样的。需要添加 UEFI 支持可以参考 BLFS 的 Grub 安装 和 内核配置 。
注意如果在实机使用需要闭源内核,还得参考 BLFS 的固件部分 。
创建 Grub 引导
10.4. Using GRUB to Set Up the Boot Process 需要注意,这里的命令需要修改,硬盘名称应该根据 df -h 输出确定:
$ (lfs chroot) root:/# df -h
Filesystem      Size  Used Avail Use% Mounted on
/dev/sdf1        15G  5.3G  8.7G  38% /
$ grub-install --target i386-pc /dev/sdf1
/boot/grub/grub.cfg 也需要同步修改:
cat > /boot/grub/grub.cfg << "EOF"
# Begin /boot/grub/grub.cfg
set default=0
set timeout=5

insmod part_gpt
insmod ext2
set root=(hd0,2)

menuentry "GNU/Linux, Linux 6.7.4-lfs-12.1" {
        linux   /boot/vmlinuz-6.7.4-lfs-12.1 root=/dev/sdf1 ro
}
EOF
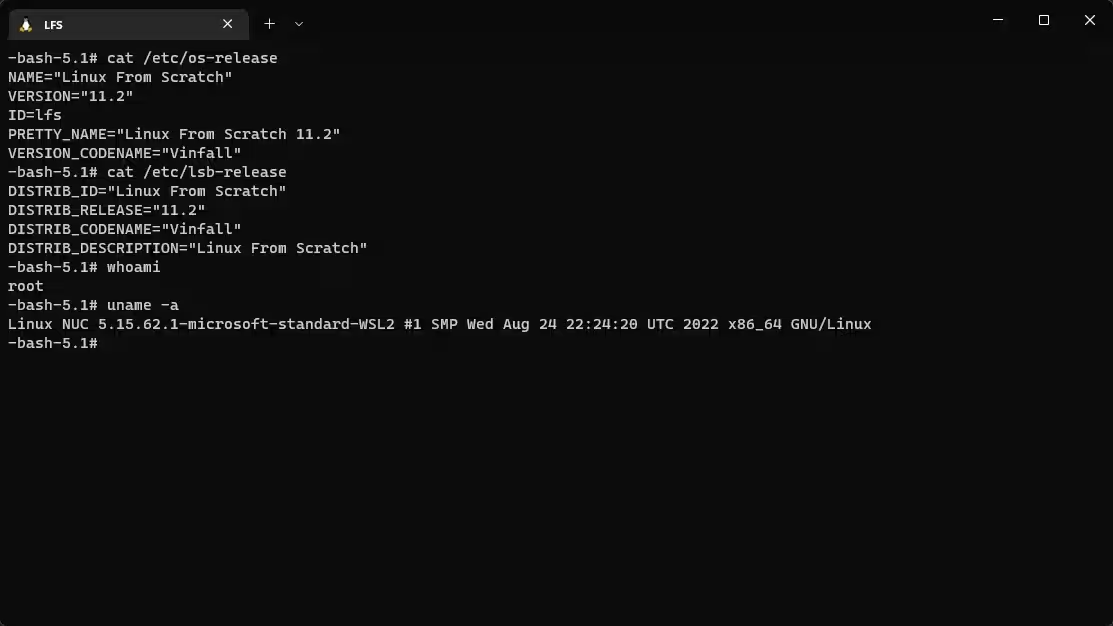
创建 Release
echo 12.1 > /etc/lfs-release

# Used by Linux Standards Base
cat > /etc/lsb-release << "EOF"
DISTRIB_ID="Linux From Scratch"
DISTRIB_RELEASE="12.1"
DISTRIB_CODENAME="vinfall"
DISTRIB_DESCRIPTION="Linux From Scratch"
EOF

# Used by systemd & GUI components
cat > /etc/os-release << "EOF"
NAME="Linux From Scratch"
VERSION="12.1"
ID=lfs
PRETTY_NAME="Linux From Scratch 12.1"
VERSION_CODENAME="Vinfall"
HOME_URL="https://www.linuxfromscratch.org/lfs/"
EOF
Post-LFS
参考 11.5. Getting Started After LFS,在 HOST 系统(而不是 LFS chroot)创建 mount-virt.sh,并且添加别名到 ~/.bashrc,注意修改默认的 /mnt/lfs(即前文中的 $LFS),由于我的 HOST 就是 LFS 去掉了 sudo 设置:
# LFS
#export LFS=/mnt/wsl/PhysicalDrive1p1
alias lfs='/usr/sbin/chroot /mnt/wsl/PhysicalDrive1p1 /usr/bin/env -i HOME=/root TERM="$TERM" PS1="\u:\w\\\\$ " PATH=/bin:/usr/bin:/sbin:/usr/sbin /bin/bash --login'
扩展
留念
如果闲着没事干可以先精简一下 VDHX 的体积:
# 在管理员权限的 PowerShell 中运行
Optimize-VHD .\lfs-rootfs.vhdx -Mode Retrim
# 如果还是太大,可以尝试下面的命令
Optimize-VHD .\lfs-rootfs.vhdx -Mode Full
参考 #备份 章节先导出 LFS 完成体的压缩包留念:
# Exit Chroot
exit
# Make sure we are root with $LFS properly set
cd && pwd && ls
whoami
echo $LFS
# Export rootfs
cd $LFS

# SLOW backup
tar czf /mnt/c/WSL/lfs-12.1/rootfs.tar.gz .

# SPEEDY backup, change 4 to preferred core numbers
tar cf - . | pigz -p 4 > /mnt/c/WSL/lfs-12.1/rootfs.tar.gz
如果备份完成 umount $LFS 分区时提示文件占用,可以进 Disk Management 选择 VHDX,右键 detach vdisk 即可解决,确认备份内容无误就可以删除巨大的 VHDX。
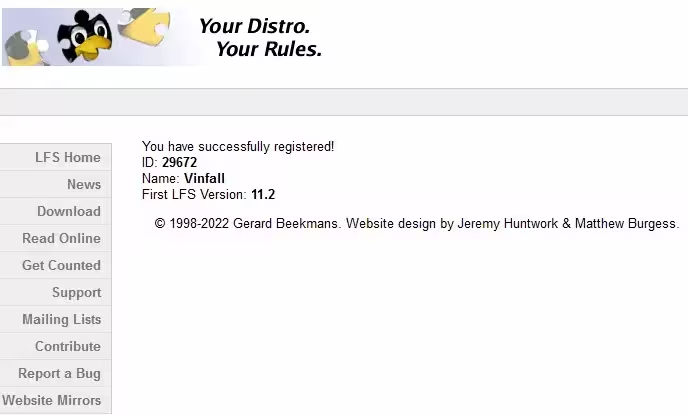
然后到 The Linux From Scratch Counter 登记(11.2. Get Counted)。
Custom WSL2-Linux-Kernel
其实非常简单,因为之前使用过 DevuanWSL ,早就了解到了 wsldl ,只需要下载 release(icons 不用下 反正也没有 LFS 的),导入此前导出的压缩包即可制作自己的 LFSWSL 镜像。
说句题外话,可以直接导入为 WSL distro 是因为 LFS 本身满足 rootfs 的要求,对于其他没有官方支持的 GNU/Linux 发行版而言,通常需要从 Docker 镜像中提取用于制作 WSL 的 rootfs(Updated on 2022-10-03: 也可以从 Linux Containers 下载)
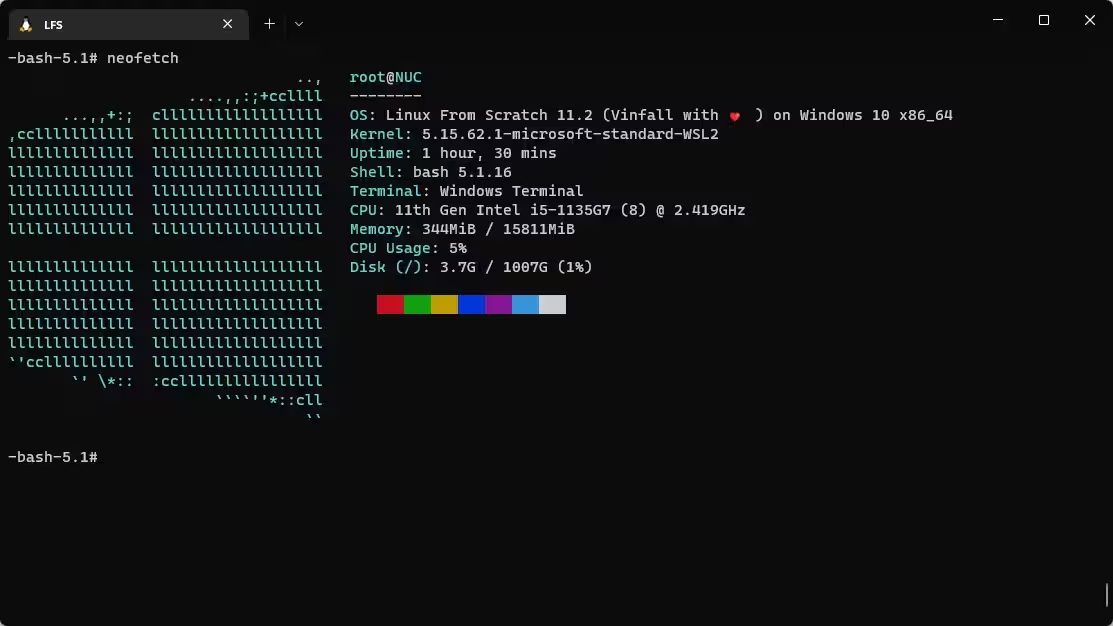
可以看到下图中的内核为微软魔改版本:
出于学习 Linux 系统和第一次编译的时候太匆忙选项没看完的目的,重新编译一次微软的 WSL2-Linux-Kernel ,同时 启用 USB 支持 ,毕竟这样才算是 100% 的 from scratch。幸运的是,编译 WSL 内核需要的依赖在 LFS 的 toolchain 里都安装了,可以直接在 LFS WSL 中进行编译。
# Change version
KERNEL_VER="5.15.153.1"
# Get latest tarball
wget "https://github.com/microsoft/WSL2-Linux-Kernel/archive/refs/tags/linux-msft-wsl-${KERNEL_VER}.tar.gz"
mv WSL2-Linux-Kernel-linux-msft-wsl-${KERNEL_VER}.tar.gz /usr/src/
cd /usr/src
tar xf WSL2-Linux-Kernel-linux-msft-wsl-${KERNEL_VER}.tar.gz
cd WSL2-Linux-Kernel-linux-msft-wsl-${KERNEL_VER}
unset KERNEL_VER
#################
# Choose one between 1 & 2
# 1. Copy current kernel config, recommended
cp /proc/config.gz config.gz
gunzip config.gz
mv config .config
# 2. Use official Microsoft kernel config
make KCONFIG_CONFIG=Microsoft/config-wsl
#################
# Prepare for compilation
# (no need if using method 1 above?)
#make mrproper
# Double check we get kernel settings modified
make menuconfig
# Customization
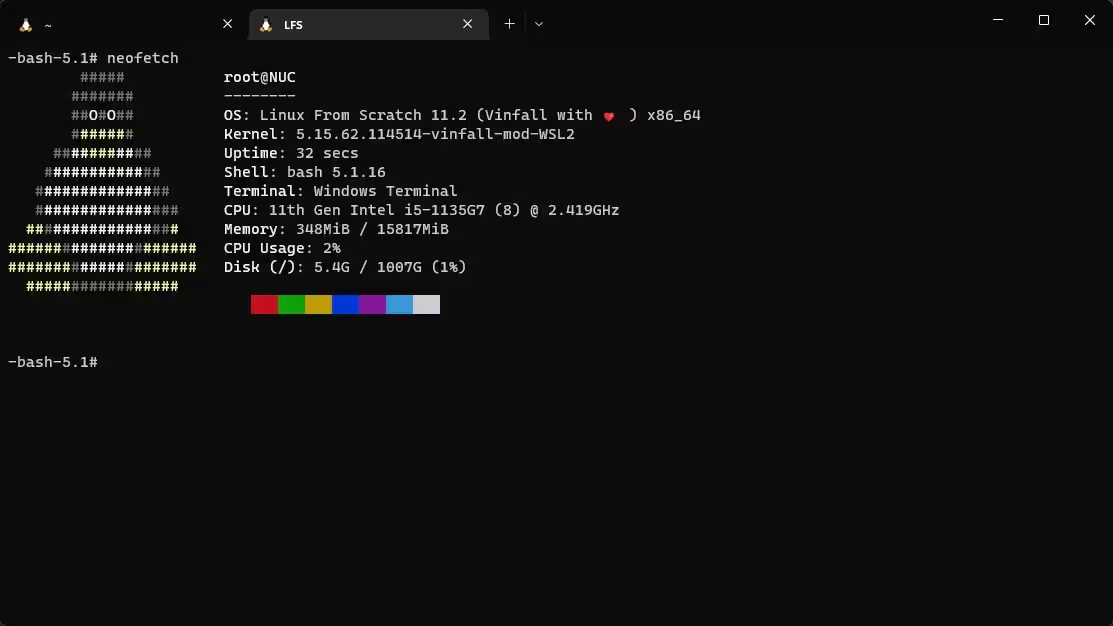
# Change EXTRAVERSION to 114514
vim Makefile
# Changes
# CONFIG_LOCALVERSION
# CONFIG_CRYPTO_CAMELLIA
# CONFIG_CRYPTO_SERPENT
# CONFIG_CRYPTO_TWOFISH
vim .config
内核设置参考文档:
- LFS 10.3.1. Installation of the kernel
- BLFS 的 UEFI 选项这里用不到就不加了
- 向 Linux 侧添加 USB 支持 (后来发现 Windows 11 Build 22000 以上,5.10.60.1 以上版本的内核其实已经 支持连接 USB 设备 了)
- 添加 DM-Crypt 支持 (~~只需修改
CONFIG_DM_CRYPT=y这一行,~~要改好多地方,微软的config-wsl只启用了DM_CRYPT而已) - VeraCrypt - Arch Linux
- How to configure the Linux kernel/crypto
- HowTo: Create Patch Using Diff Command – Linux
下面只是 Dev on Windows with WSL 添加 USB 支持的部分,LFS 部分请参考 #编译 Linux 内核:
Device Drivers->USB support[*]
Device Drivers->USB support->Support for Host-side USB[M]
Device Drivers->USB support->Enable USB persist by default[*]
Device Drivers->USB support->USB Modem (CDC ACM) support[M]
Device Drivers->USB support->USB Mass Storage support[M]
Device Drivers->USB support->USB/IP support[M]
Device Drivers->USB support->VHCI hcd[M]
Device Drivers->USB support->VHCI hcd->Number of ports per USB/IP virtual host controller(8)
Device Drivers->USB support->Number of USB/IP virtual host controllers(1)
Device Drivers->USB support->USB Serial Converter support[M]
Device Drivers->USB support->USB Serial Converter support->USB FTDI Single Port Serial Driver[M]
Device Drivers->USB support->USB Physical Layer drivers->NOP USB Transceiver Driver[M]
Device Drivers->Network device support->USB Network Adapters[M]
Device Drivers->Network device support->USB Network Adapters->[Deselect everything you don't care about]
Device Drivers->Network device support->USB Network Adapters->Multi-purpose USB Networking Framework[M]
Device Drivers->Network device support->USB Network Adapters->CDC Ethernet support (smart devices such as cable modems)[M]
Device Drivers->Network device support->USB Network Adapters->Multi-purpose USB Networking Framework->Host for RNDIS and ActiveSync devices[M]
# Compile kernel
declare -x MAKEFLAGS='-j5'
make
make modules_install
# NO NEED to make install
#make install
# Backup compiled kernel
# Note it's in x86 dir even on x86_64 platform
cp arch/x86/boot/bzImage /mnt/c/WSL/$(date +'%Y%m%d')-bzImage

# Compile USBIP
cd tools/usb/usbip
bash ./autogen.sh
bash ./configure
make install
# Make USBIP toolchain accessible by USBIP
cp libsrc/.libs/libusbip.so.0 /lib/libusbip.so.0
# Backup USBIP & config
cp libsrc/.libs/libusbip.so.0 /mnt/c/WSL/libusbip.so.0
cd ../../../
cp .config /mnt/c/WSL/dm-crypt-plus-usb-kernel.config
cp dm-crypt-plus-usb.patch /mnt/c/WSL/dm-crypt-plus-usb.patch
按照 Replacing the WSL Kernel ,撰写 . wslconfig 以在不修改 $Env:SystemRoot\System32\lxss\tools\kernel 的情况下使用自建内核:
[wsl2]
kernel=C:\\WSL\\bzImage
效果
魔改前:
魔改后:
Patch
几天之后 M$ 又发布了 rolling-lts/wsl/5.15.68.1 ,有了好几回编译的经验,这次成功简化了编译内核流程。
- Backup config and generate patch that will be used later:
# Change version
KERNEL_VER="5.15.153.1"
# Backup config
cp Microsoft/config-wsl $HOME/linux-msft-wsl-${KERNEL_VER}.config
cp .config $HOME/dm-crypt-plus-usb-kernel.config
# Geterante patch
TZ=UTC diff -u Microsoft/config-wsl .config > $HOME/dm-crypt-plus-usb.patch
unset KERNEL_VER
- How to use patch:
cp Microsoft/config-wsl .config
patch .config < dm-crypt-plus-usb.patch
- Make sure we are safe by comparing with current custom kernel config:
cp /proc/config.gz config.gz
gunzip config.gz
diff config .config
- The output should be like:
3c3
< # Linux/x86 5.15.62.114514 Kernel Configuration
---
> # Linux/x86 5.15.68.114514 Kernel Configuration
- If anything goes wrong, just revert the patch:
patch -R .config < dm-crypt-plus-usb.patch
自定义软件
wget -O screenfetch-dev https://raw.githubusercontent.com/KittyKatt/screenFetch/master/screenfetch-dev
chmod +x screenfetch-dev
mv screenfetch-dev /usr/bin/screenfetch
- neofetch-7.1.0 (硬依赖只有
Bash,其余均为扩展功能的依赖)
tar xf neofetch-7.1.0.tar.gz
cd neofetch-7.1.0

# The default is /usr/bin already, see MAKEFILE
# make PREFIX=/usr/bin install
make install
/etc/lsb-release overrides /etc/os-release, change the DISTRIB_DESCRIPTION in /etc/lsb-release to make it available in neofetch.
# Install
cd /usr/src
tar xf fff-2.2.tar.gz
cd fff-2.2
make PREFIX=/usr/local install

# Uninstall
make uninstall
make
mv pigz /usr/local/bin/pigz
Beyond Linux From Scratch
N.B. Version bumped to BLFS 12.1 as I rebuilt a LFS WSL recently. Please follow the manual against the version you’re building.
- BLFS Boot Scripts
- p11-kit-0.25.3
- make-ca-1.13 (
touch /usr/bin/trustto surpress warnings) - Wget-1.21.4
- Fcron-3.2.1 (go back to
make-cato enable periodic jobs) - cURL-8.6.0 (cURL-8.7.1 does not work on LFS 12.1 due to missing dep)
- Git-2.44.0
- lsof-4.99.0
- Lynx-2.8.9rel.1
- rsync-3.2.7
- zsh-5.9
- Sudo-1.9.15p5
- bash-completion
- The Bash Shell Startup Files (
rcfiles) - BLFS Wiki (install command)
- bash-completion-2.12.0 (works fine)
- The Bash Shell Startup Files (
./configure --prefix=/usr --sysconfdir=/etc
make
make install
# Run the command as root
cat > /usr/bin/which << "EOF"
#!/bin/bash
type -pa "$@" | head -n 1 ; exit ${PIPESTATUS[0]}
EOF
chmod -v 755 /usr/bin/which
chown -v root:root /usr/bin/which
Ventoy
理想的情况下,Ventoy 启动本地 VHDX(可以的话就不用导出了)。
应该用 Linux vDisk 而不是 Windows VHD。
理论上是可行的,最起码可以在目标系统运行 vtoyboot ,再使用 dd 把整个 rootfs dump 成 raw disk,然后就可以用 Ventoy 启动了,甚至理论上可以直接添加 Grub 启动项,脱离 Ventoy 启动。不过 LFS 太过耗费精力,再研究得是 #有生之年 系列了。
突发奇想,感觉可以进入 chroot 然后直接镜像整个
不行,如果是 rootfs 解压得到的文件,/ 就好了lsblk 不显示(毕竟没有磁盘分配);
如果从 LFS WSL 直接创建 chroot,这就是在有读写的文件系统上进行 dd 了,可能会得到损坏的文件。这还不算什么,实际上 WSL 的分区并不规则,直接 dd 看起来最可疑的分区,可能会直接填炸你的硬盘。
(浪费了 SSD 40G 读写的经验之谈)
这个问题还挺难的,目前能想到最简单的办法还是像#分区里提到的一样创建虚拟磁盘、手动分区,然后 dd。但我都创建虚拟磁盘了,不直接运行磁盘?(说笑的,毕竟本章第一句话就毙了这个想法)
相关文档:
Misc
可以试试使用 isolinux 导出成 Live CD,其实和 Ventoy 那章的目的一样。
如果还有精力,可以试试 ALFS,自动化整个流程(至少是编译内核的部分)。
甚至还可以更进一步,尝试在 Termux 或 rpi4 构建 cross-toolchain,并且构建 LFS(CLFS):
- PiLFS
- CLFS Trac (3.0.0) & cross-lfs GitHub
- Building Linux From Scratch on Raspberry Pi 1
- jfdelnero/LinuxFromScratch: Cross compiler + Linux system build scripts.
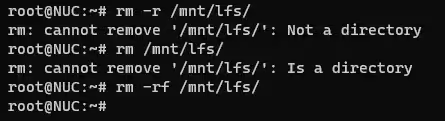
彩蛋 🎉
GNU/Linux is terrible, you can’t even remove a folder™️: