TLDR
- devkitPro
- libnx
- Example
- Makefile template
- stratosphere: Atmosphere’s custom or reimplemented sysmodules
- switch-examples
Setup devkitA64
I’m on DevuanWSL and as devkitPro (the organization) provides install script on Debian based systems to set it up, it’s really simple.
# Install dkp-pacman
wget https://apt.devkitpro.org/install-devkitpro-pacman
# Read script before continuing
chmod +x ./install-devkitpro-pacman
sudo ./install-devkitpro-pacman

# Only do this if on WSL
# sudo ln -s /proc/self/mounts /etc/mtab

# Install devkitA64
sudo dkp-pacman -Syu
sudo dkp-pacman -S switch-dev

# Make sure "DEVKITPRO" is in $PATH
export | grep DEVKITPRO
# If not, add it to shell rc, zsh plugin or wherever you like
#echo "export DEVKITPRO=/opt/devkitpro" >> $HOME/.bashrc
echo "export DEVKITPRO=/opt/devkitpro" >> $HOME/.dotfiles/zsh/switch.zsh
Hello World
First, get a copy of app template from SwitchBrew repo. Or since we install switch-dev package already, switch-examples is installed as well.
# Method 1
git clone --depth=1 https://github.com/switchbrew/switch-examples
cp -r switch-examples/templates/application my-awesome-homebrew-app
# Method 2, recommended
cp -r $DEVKITPRO/examples/switch/templates/application my-awesome-homebrew-app

cd my-awesome-homebrew-app
git init
echo "*.elf\n*.nacp\n*.nro\nbuild/*\n" > .gitignore
Next, add APP_TITLE, APP_AUTHOR, APP_VERSION and probably APP_TITLEID in Makefile#L39-L45.
Also add a 256×256 icon.jpg next to it.
Now just type make and see the magic happen with an outputted my-awesome-homebrew-app.nro. Copy it to sdcard:switch/ or open it in Ryujinx (Yuzu would freeze forever works now) to see the “Hello World” screen.
If you change the folder name and run make again, it would fail due to using old build caches. Run make clean would solve this.
Development
General Tips
Everyone has their own unique path to success so I’ll leave just a few useful resources for you to discover. Also homebrew development is not limited to C/C++. You can utilize your skill of Lua, Rust, Python and more.
- SwitchBrew (homebrew wiki)
- ANSI color commands
- HID buttons values
- devkitPro Forum Switch Development
- Error codes
- devkitA64: termios.h compilation error
- List of Switch homebrew titleID
Sysmodule
SwitchBrew repo has sysmodule template, but it hasn’t been updated for three years which makes me resort to de facto leading Tesla-Template.
Setup example for personal future reference:
# Clone template
git clone --recurse-submodules https://github.com/WerWolv/Tesla-Template

# Re-init
rm -rf .git .gitmodules
git init
git submodule add https://github.com/WerWolv/libtesla ./libs/libtesla
#git submodule add https://github.com/Atmosphere-NX/Atmosphere-libs.git ./libs/Atmosphere-libs
#git submodule add https://github.com/switchbrew/libnx.git ./libs/libnx
git submodule update --init --recursive

# Do something and commit
git add .
git commit -m 'Initial commit'
git push
Thoughts
One thing that pushed me back is the confusing name of Nvidia Tegra X1 (which powers Switch) homebrew low level graphics API: deko3d. I’ve dig into Linux kernel, build a custom system bootable in QEMU (not based on other systems like a GNU/Linux distro, but really from scratch written in C and Assembly), but not to the point of having deep understanding of different backend API. I understand that Vulkan, OpenGL, SDL are different but not low enough to write codes in GLSL or CUDA to render graphics with the GPU.
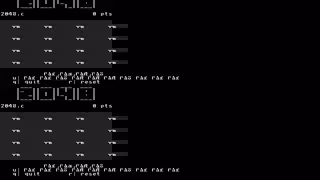
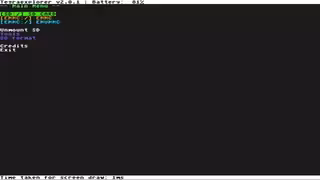
After trying to write a homebrew app myself, I would no longer laugh at the retro UI of Lockpick_RCM or TegraExplorer. At least they look more organized than my shabby and garbled app🤣.
When you haven’t used a language for a while
Simplicity is perfect
By the way, it seems not possible to define a title ID for Simply add nro. If you want to customize it, convert nro into nsp and edit that instead.APP_TITLEID in Makefile.